Synthesis AI: Command Line Interface
Overview
Synthesis AI's product line comprises both pre-made datasets as well as a data generation API that can create millions of labeled images of faces with a specifiable variety of sexes, ethnicities, ages, expressions, eye gazes, hair, hats, glasses, and more.
Because datasets and API jobs can contain millions of files and terabytes of data, the easiest way to create jobs and download renders is with our command line interface application, described on this page. While the CLI simply uses our APIs (like the Asset Download API) that you could issue HTTPS requests to directly, the application adds niceties for common scenarios like HTTPS retries, downloading subsets of a job, and more.
Workflow
The standard workflow for the Synthesis AI Human API is:
- Register Account, Download & Setup CLI
- Select Identities for the Human API with the Identities API
- Create Human API job with input JSON
- Download job output with CLI
- Parse outputs into your ML pipeline
Setup
1. Download the CLI Application
Binaries are available for:
Add Binary Directory to $PATH / Move Binary To $PATH
So that you don’t have to type the full path to the synthesis binary in the terminal every time you run the binary, we suggest either moving it to a typical PATH, like /usr/bin/local/, or adding the export line for the directory containing the synthesis binary to your shell’s .*rc or .*_profile file, like:
export PATH="/path_to_binary_directory/:$PATH"
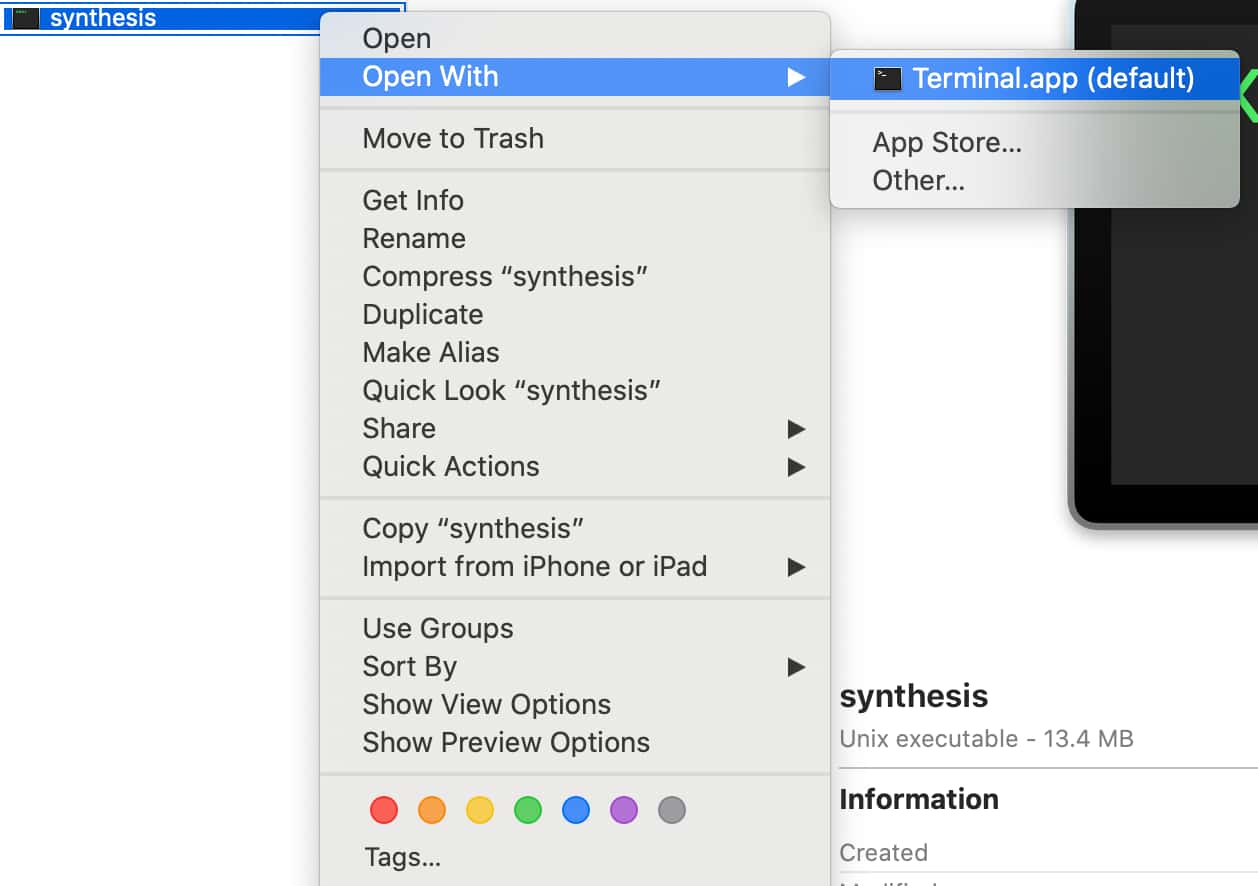
Allow macOS Execution
If you get this message, you need to allow the execution of the application binary on your computer.
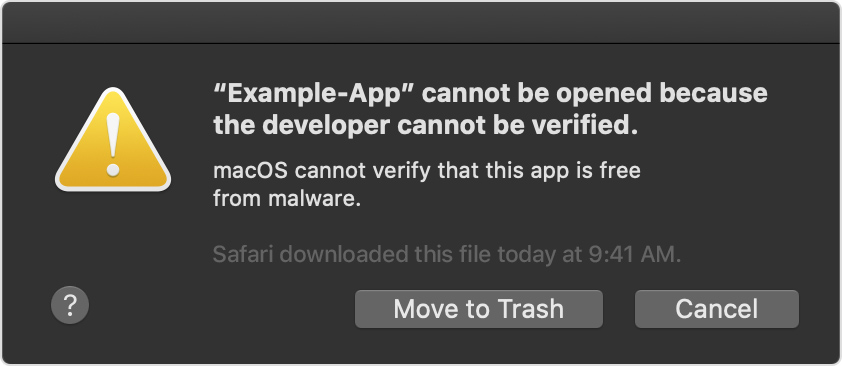
You can allow execution on the mac by right-clicking on the synthesis binary in the finder,
2. Download & Set API Key
In order to use the CLI, you have to register an account in the Synthesis AI web application, and download an API key. Once you download an API key, run the command in the CLI to set the api key.
$ synthesis apikey set APIKEY
You can manage your account's API keys and generate a new one at the API Key Management section of our web application. Generating a new one will provide a dialog like the following:

3. Select Org
Nearly all functions, like job creation and dataset downloading, require an org to be “in use” by the CLI.
The simplest way is to simply pass in the name of your org, and it will confirm your membership in the org.
$ synthesis org use ORG
If you are a member of multiple orgs or don't know the exact spelling, don't pass in anything and it will provide a list of your current organizations to choose from.
$ synthesis org use
You are a member of acme. Use it? (Y/n)   Y
org set to acme.
If you are a member of many orgs, you’ll be prompted to enter the name of the org you want to use:
Choose an organization by typing its name, or Control-C to cancel.
acme
acme-dev

Organization:    amce
org set to acme.
4. Alternative: "User Init" for API Key & Org
As a short-hand for setting the API & Org at the same time, you can run the synthesis user init command.
synthesis user init aB0cdEFgh1IjKlMnopq2 orgname
Requesting Identities for use in the Human API
The facial identities in the Human API each have a numerical ID (e.g. 79, 80), and are consistent between every run. Identities are available in many ethnicities and age groups, and each ID also has consistent demographic information with it that is returned on output (sex, ethnicity, age).
The synthesis command line tool has a subcommand called humans ids that return distributions of IDs according to specified attributes of sex, ethnicity, and age groups that should be present within the "percent" group (see: more about Percent Groups per Parameters). Multiple "percent" groups can be specified within a single request criteria, but note that the IDs will be returned as a single array representing the entire distribution.
The synthesis humans ids command takes a json file with the specified request and in return downloads a results.json file to the directory specified. Then, copy and paste the returned list of IDs into a humans request.
Available Sexes
"male""female"
Available Ethnicities
"arab""asian""black""hisp""indian""white"
Available Age Groups
"0-24"Note: At present, Synthesis AI only has identities ranging between ages 18-24 for this group."25-34""35-44""45-54""55-"
In addition, each of these categories can use the 'all' selector which will automatically insert the full list of available values when processing the request.
ID Request Input JSON
A request for IDs starts by creating a file with a json object that defines the requested attributes.
In this example, the request is a single distribution which returns a set of IDs from any sex, ethnicity or age group. It provides the most variety.
{
  "count": 100,
  "criteria": [
    {
      "sex": ["all"],
      "ethnicity": ["all"],
      "age": ["all"],
      "percent": 100
    }
  ]
}
A request for IDs from the full distribution can also be shortened to just the count and the rest will be filled in by default. The request below will provide the same attributes to select from as above.
{
  "count": 100
}
Prefer Full Count
The Identities API also inlcudes prefer_full_count, which defaults to true. Synthesis may not always have enough of a specific demographic combination of sex/ethnicity/age-group to return a full count for the distribution calculated. prefer_full_count, will ensure a full count of unique IDs by first trying to select additional IDs from the same sex and ethnicity as the missing group, and finally the same sex. If there there are not enough IDs within a specific combination of attributes, additional similar IDs will be returned in order to fill the count, along with information about which were added. In order to disable this functionality, set prefer_full_count to false in the ID Request JSON.
{
  "count": 100,
  "prefer_full_count": false,
  "criteria": [
    {
      "sex": ["all"],
      "ethnicity": ["all"],
      "age": ["all"],
      "percent": 100
    }
  ]
}
Send IDs Request
Once the request file has been created, send it off with the following command
$ synthesis humans ids /PATH_TO/ID_REQUEST.JSON
By default, the results will be downloaded to your current working directory as results.json. In order to not overwrite the same file, specify the directory and/or filename to put the returned results
$ synthesis humans ids /PATH_TO/ID_REQUEST.JSON -o DIR/FILENAME
View the Results
Once the results are downloaded, which may take a few second on larger counts, the file should look something like this, which is the result of a single count request to "all"
{
  "status": "success",
  "data": {
    "ids": [
      2564
    ],
    "warnings": []
  },
  "message": "requested: 1, returned: 1"
}
Examples
In this example each of the available attributes is set explicitly to select from all available IDs.
{
  "count": 100,
  "prefer_full_count": false,
  "criteria": [
    {
      "sex": ["male", "female"],
      "ethnicity": ["arab", "asian", "black", "hisp", "indian", "white"],
      "age": ["0-24", "25-34", "35-44", "45-54", "55-"],
      "percent": 100
    }
  ]
}
And this shows a complex set of distributions.
{
  "count": 100,
  "prefer_full_count": false,
  "criteria": [
    {
      "sex": ["male"],
      "ethnicity": ["hisp", "black", "white"],
      "age": ["0-24", "35-44"],
      "percent": 60
    },
    {
      "sex": ["female"],
      "ethnicity": ["hisp", "arab", "white", "indian"],
      "age": ["45-54", "55-"],
      "percent": 40
    }
  ]
}
Creating Jobs
Once you’ve set your API key and an org to use, you can create a job, specifying millions of images to generate.
Each job is specified by an input json file. This file’s format is documented in the Human API: Input Documentation
$ synthesis humans create /PATH_TO/INPUT.JSON
This returns a job ID which you will need to save for future reference, including downloading files resulting from this job. The job will also appear in the web app’s jobs table.
Successfully created

 API job with ID 12ab3c45-678-9d12-34ef-5ghijkl678f8
A job can take several minutes to several days to complete. The account that created the job will receive an email automatically on completion, and you can check the status of a job with the CLI or web app.
Set Job Name
Every job has a non-unique job name for ease of identification. This job name can be viewed and changed at any time in the web application. You can optionally set the job name with the --name argument to the CLI. Otherwise your job will be assigned a name by the Synthesis AI server.
$ synthesis humans create /PATH_TO/INPUT.JSON --name my_job_name
Notification Email(s)
The account that created a job will receive an email automatically on completion of it. You can also specify multiple email addresses that get a notification upon completion with the --notify-emails argument to the CLI.
$ synthesis humans create /PATH_TO/INPUT.JSON --notify-emails user1@example.com,user2@example.com
Checking Job Status
You can always check how many renders have been created so far by calling the job status CLI command.
$ synthesis job status 12ab3c45-678-9d12-34ef-5ghijkl678f8
The result will tell you if it’s completed or how many renders are still remaining:
status: submitted
458/500 renders created
Cancelling Jobs
To stop a job from completing, run the cancel command.
$ synthesis job cancel 12ab3c45-678-9d12-34ef-5ghijkl678f8
Note: any renders that have completed will still count towards your org’s usage.
Downloading Jobs
Once you’ve set your API key and an org to use, you can download any jobs attached to your org. You'll first want to see what assets were generated for this particular job.
$ synthesis job assets view JOBID
The command outputs a table enumerating all assets that were generated for this job. The "flag" column is used to indicate to the CLI which assets you'd like to download.
$ synthesis job assets download JOBID --assets COMMA_SEPARATED_FLAGS -o /OUTPUT_DIR/
The JOBID is provided in our web application, and you specify an output directory to download to with the -o flag. If the directory does not exist, the CLI creates the directory path first.
COMMA_SEPARATED_FLAGS can be constructed from values found in when viewing available assets via the CLI. An example use might look like --assets rgb,info
You can read more about the available assets in the file type options section.
Spec / Input JSON
Each job was created with a input JSON for the API (see: data creation api reference). This JSON can be downloaded for future reference and as a starting point, by using the spec subcommand.
$ synthesis job spec JOBID
This will return the spec and download it as a file. The default location is the current working directory, and the default file name is spec.json
A specific download directory and filename can be set with the -o or --output-dir flags.
Example setting complete filepath, will download to mydir/filename.json.
$ synthesis job spec JOBID -o mydir/filename.json
Ex: setting filename only
$ synthesis job spec JOBID -o filename.json
If you prefer to direct this to STDOUT, you can do so with the -s flag:
$ synthesis job spec -s JOBID
Download Concurrency
To expedite downloading of potentially millions of files, concurrent http requests are made for each asset. The maximum concurrent http requests made are controlled by the --concurrency/-c argument, which defaults at 35.
Operating systems often have a maximum number of HTTP requests that can be open and files that can be open for writing at any given time, so depending on your system you might have to decrease this number.
On the other hand, if the computer is on AWS, you can likely increase this number and get a much quicker total download time.
$ synthesis job assets download JOBID --assets all -c 50 -o /OUTPUT_DIR/
File Types Options
For each render, there are 3 file types that are considered the 'source' data:
*.exr*.info.json- applicable line within
metadata.jsonl
For ease of use, the platform also extracts standalone images from the EXR for rgb, alpha, depth, surface normals, and segmentation.
The CLI provides the following flags to control which of these are downloaded:
all: download all assets, including extracted standalone images
metadata: download job-wide metadata.jsonl file.exr: download each individual EXR fileinfo: download each individual info.json file
rgb: download each individual rgb (png)alpha: download each individual alphadepth: download each individual depth filenormals: download each individual surface normals filesegments: download each individual include segmentation file
Typical use for a quick visual check of render rgb files:
$ synthesis job assets download JOBID --assets metadata,info,rgb -o /OUTPUT_DIR/
Range Option
The CLI allows downloading of a specific set of renders, as opposed to all renders of a job with the -r/--render-ids flag. Use comma separated numbers and ranges, like: 0,3,50-100
The following example downloads all file types for renders 0, 1, 3, 4, and 5.
$ synthesis job assets download JOBID --assets all -r 0,1,3-5 -o /OUTPUT_DIR/
API Access
For those who want to download programmatically, you can integrate our Asset Download API
Status
Users can check the health of client configuration by running the status command — status displays the status of the connection between the server and api key, e.g.:
$ synthesis status
Configuration file: /Users/Library/Preferences/synthesis/config.json
Org set to foo
Checking connectivity with Synthesis AI at: https://app.synthesis.ai
Server reachable
APIKey found
Authenticated successfully with the API key
Confirmed membership in foo
Global --config File Argument
For advanced users who use multiple orgs regularly, a simple way to keep settings separate is by duplicating config files, one for each user.
With any command you can append the --config argument, specify which org is in use specific to that file config.
For example, to create a config file specific to the acme org, you would do:
$ synthesis apikey set  --config ~/.synthesis-acme.json
$ synthesis org use --config ~/.synthesis-acme.json
… acme …
And then to continue to use it, you would do:
$ synthesis humans create PATH_TO/INPUT.JSON --config ~/.synthesis-acme.json
Global --help Flag
Anytime you’re unsure about what arguments apply to which commands, you can run the --help flag.
Examples:
$ synthesis --help
$ synthesis humans --help
$ synthesis humans create --help